You can find many note-taking services, like, Evernote, Google Keep, Notion, Obsidian and online storage services such as, Dropbox, Google Drive, OneDrive, iCloud. They are easy to use and secure. But, secure is not equal to private! A way to keep privacy is host private services by self.
Edward Snowden’s Privacy Tips: “Get Rid Of Dropbox,” Avoid Facebook And Google

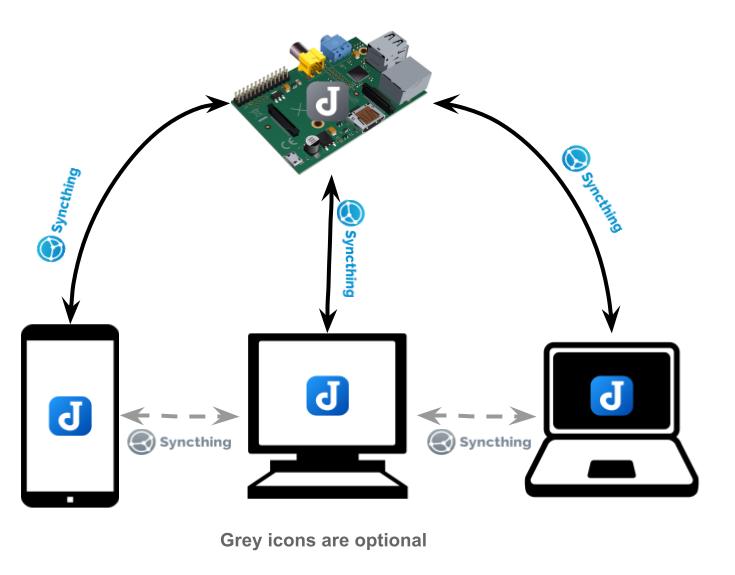
This is how I share/edit notes and files with different devices which service providers are unable to peek and analyze my private contents. Joplin and Syncthing in grey are optional in the diagram, for example notes can be written on the Raspberry Pi through the terminal Joplin application, files can share between the Phone and the PC directly but my Raspberry Pi is online 24/7.
At least two devices is needed, here shows how to install Syncthing and Joplin on an Ubuntu PC and a Raspberry Pi. Steps are described briefly and details in the following sections
Basic setup:
- Install Syncthing on Raspberry Pi and Ubuntu PC
- Share the
joplin-syncfolder by Syncthing between Raspberry Pi and PC - Install Joplin on Ubuntu
- Set synchronization target to
File system
- Set synchronization target to
Once 2 devices are setup and in sync for adding a new device:
- Install Syncthing on the new device
- Add remote device by Syncthing on Raspberry Pi
- Share the
joplin-syncfolder to the new device - Install Joplin on the new device
- Set synchronization target to
File systemon the new device
Installing Syncthing on Ubuntu
First, installing Syncthing on a local device which is Raspberry Pi in this example.
Adding Syncthing to The Package Manager
$ sudo curl -o /usr/share/keyrings/syncthing-archive-keyring.gpg https://syncthing.net/release-key.gpg
$ echo "deb [signed-by=/usr/share/keyrings/syncthing-archive-keyring.gpg] https://apt.syncthing.net/ syncthing stable" | sudo tee /etc/apt/sources.list.d/syncthing.list
$ sudo apt-get update
$ sudo apt install syncthing
Starting Syncthing Service
$ syncthing
[start] 2022/06/02 17:20:14 INFO: syncthing v1.20.1 "Fermium Flea" (go1.18.1 linux-amd64) deb@build.syncthing.net 2022-05-04 16:17:03 UTC [noupgrade]
[start] 2022/06/02 17:20:14 INFO: Generating ECDSA key and certificate for syncthing...
[start] 2022/06/02 17:20:14 INFO: Default folder created and/or linked to new config
[start] 2022/06/02 17:20:15 INFO: Default config saved. Edit /home/sam/.config/syncthing/config.xml to taste (with Syncthing stopped) or use the GUI
...
[K6V4V] 2022/06/02 17:20:16 INFO: GUI and API listening on 127.0.0.1:8384
Now, you can access the service by http://localhost:8384 and set username/password.
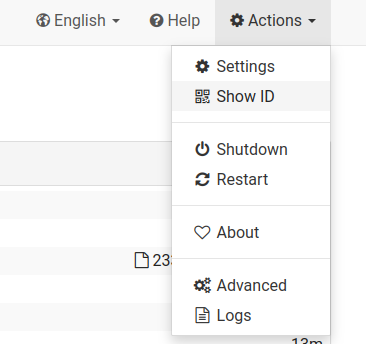
Device ID could be found at Show ID in Actions menu, copy or write it down for later use.
Enabling Syncthing Automatically
You can start Syncthing automatically by 2 ways on Unix-like systems, a system service or an user service.
For Raspberry Pi, I would setup a system service since it runs as a server role, somehow the service has been setup after installation, I found syncthing.service under /.config/systemd/user/default.target.wants. I’d recommend to restart the Raspberry Pi for checking if Syncthing is shown in the process status(ps -axf), if it’s not there you can follow How to set up a system service
For Ubuntu PC, I setup the Desktop Entry, just simply copy script into ~/.config/autostart/ folder. see Using the Desktop Environment
$ wget https://raw.githubusercontent.com/syncthing/syncthing/main/etc/linux-desktop/syncthing-start.desktop -O .config/autostart/syncthing-start.desktop
Adding A Remote Device
Second, Repeat previous to install Syncthing on the remote device which is an Ubuntu PC.
After installing Syncthing on both Raspberry Pi and PC, you are ready to create a sync folder via the Syncthing service.
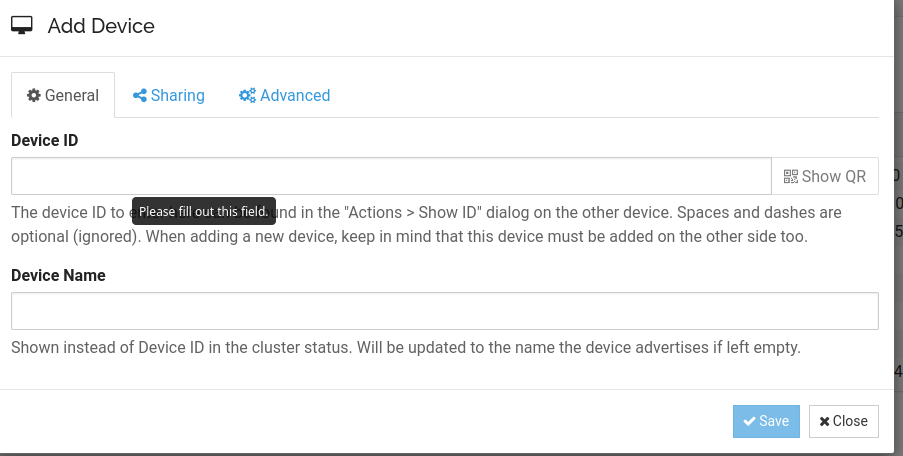
Access the service of Raspberry Pi and click Add Remote Device and past PC’s Device ID
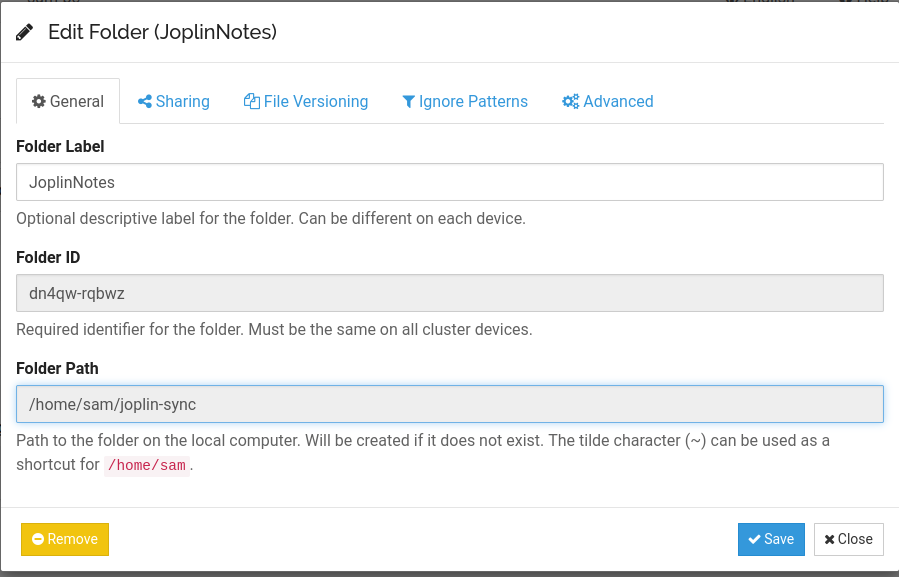
Click Add Folder and fill in Folder Label and Folder Path as you preferred.
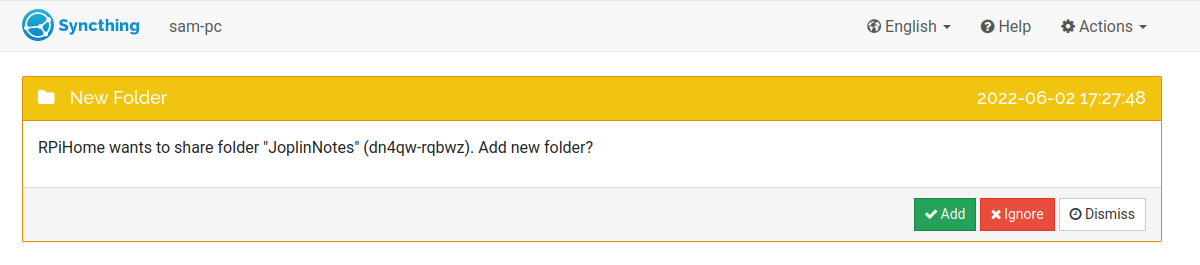
Select the Sharing tab to setup the remote device
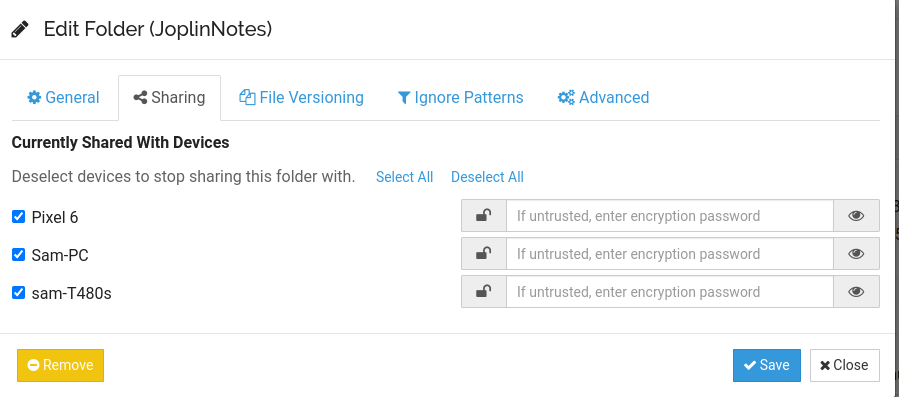
Once Save is clicked, an notification will be popped up on the PC’s web-page asking to accept the invitation from the remote device(Raspberry Pi)
Install Joplin
The recommended way to install Joplin Desktop application is from the installing script which it can create desktop icon and keep application up-to-date.
wget -O - https://raw.githubusercontent.com/laurent22/joplin/dev/Joplin_install_and_update.sh | bash
After installation, the script created $HOME/.joplin and $HOME/.config/joplin-desktop directories on the system.
The Joplin application version can be checked by
$ cat $HOME/.joplin/VERSION
2.7.15
Database is stored in
$ ls $HOME/.config/joplin-desktop
cache  database.sqlite  log.txt  resources  settings.json  tmp
Therefore, if you would like to remove Joplin Desktop
$ rm -rf $HOME/.joplin && $HOME/.config/joplin-desktop
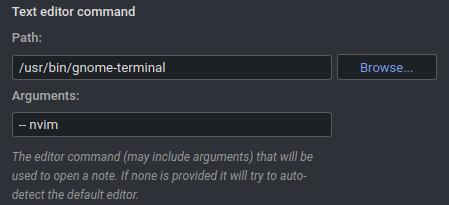
Additionally, Joplin support external editor to edit Markdown files, the way to use vim/nvim is through gnome-terminal
sudo apt install gnome-terminal
Conclusion
It is a way to keep sensitive contents in private and share them with different devices through Internet without worry about 3rd-parties controlling your data. The drawbacks are services maintenance is on yourself and troubleshooting is not easy if you have no basic understanding about how these tools work. Initial setup is kind of complicated and not handy for adding new devices but these services have run on my 4 devices for almost one year without problems.
By the way, I have been using Raspberry Pi to provide microservices for 9 years.
Notice There is an Joplin issue on mobile devices, the workaround is downgrade the app to v2.5.5 at the moment, see:
- Operation Not Permitted On Android 12 #5691
- Android filesystem sync is broken after 2.6.3 update #5779